How to Automate POD Mockups Using BulkMockup
Manual mockup creation is the silent killer of scaling a Print-on-Demand (POD) business. Spending hours dragging, dropping, and resizing transparent PNGs over blank shirt images in Adobe Photoshop drains your creative energy and eats into profit margins. When you launch a new collection across 50 different products, manual generation becomes a logistical nightmare that stalls your time-to-market.
For high-volume sellers, the solution lies in local desktop automation. This guide provides an actionable, end-to-end blueprint on how to automate POD mockups using BulkMockup, a powerful Photoshop plugin that turns hours of manual editing into a hands-off, background process. By leveraging a structured PSD automation workflow, you can generate thousands of hyper-realistic product images locally while you focus on marketing and trend analysis.
Step 1: Asset Preparation & Folder Structure
Automation software is inherently literal. It executes commands based on strict logic, which means a chaotic file system breaks your batch processing instantly. Before launching Photoshop, you must establish a flawless, predictable directory layout.
Create a dedicated master directory on your local drive. We highly recommend utilizing a fast NVMe SSD to drastically reduce read/write bottlenecks during massive export runs. Within this directory, set up three distinct folders:
- Designs Folder: This contains your final, production-ready artwork files (typically high-resolution transparent PNGs at 300 DPI).
- Templates Folder: This houses your master Photoshop (.PSD) mockup files, pre-configured with Smart Objects.
- Output Folder: The destination where BulkMockup automatically saves your rendered, web-optimized JPEG or PNG mockups.
For the automation engine to pair the right design with the correct product, alignment is key. Group your designs by product type if you use specific print areas. Investing twenty minutes in organizing your master design asset folders saves hours of troubleshooting failed exports later.
Step 2: Configuring the Master PSD Template
The heart of a successful PSD automation workflow is a properly structured template file. BulkMockup functions by targeting a specific Smart Object layer within your Photoshop file, opening it, pasting your design artwork, scaling it to fit, and saving the result.
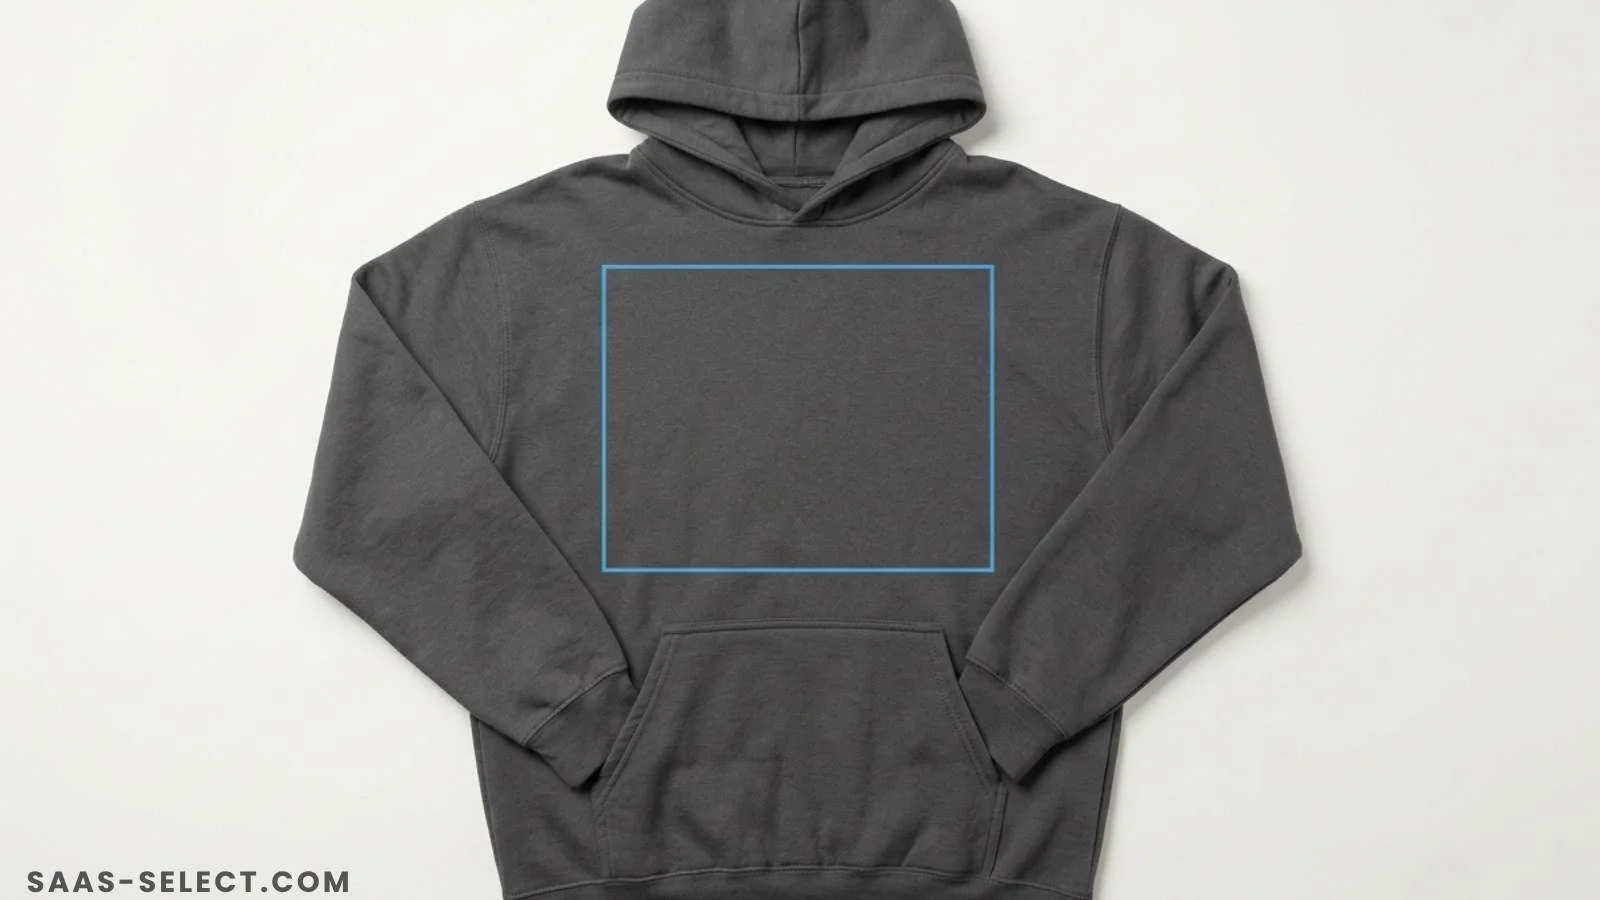
Setting Up the Smart Object Bounding Box
Open your base mockup image in Photoshop. Convert the designated print area into a Smart Object and name it clearly (e.g., PLACE_DESIGN_HERE). Double-click the Smart Object to open its nested .psb file. This bounding box defines the maximum boundaries where your artwork will render.
Adhering to Strict Brand Standards
To maintain a premium, high-converting aesthetic across moody, high-end apparel niches, your base templates must reflect professional retail manufacturing constraints:
- Color Selection: The base apparel products must feature dark colors, specifically Black, Charcoal, or Deep Navy. Avoid using white support materials or bright, saturated base garments, as they cheapen the perceived value of complex graphic designs.
- Hoodie Placement Rules: When configuring hoodie templates, the graphic bounding box must be centered precisely on the torso. It must be positioned entirely above the middle kangaroo pocket with zero overlapping. Overlapping the pocket seam breaks realism and ruins the customer experience during batch processing.
Pro-Tip for AI-Generated Backgrounds: If you use AI generation tools to create custom lifestyle base backgrounds, your AI prompt must explicitly describe the design exactly as it appears printed on the physical product. This ensures the AI model generates realistic ambient lighting, fabric folds, and texture integration that blends seamlessly with your digital artwork overlays.
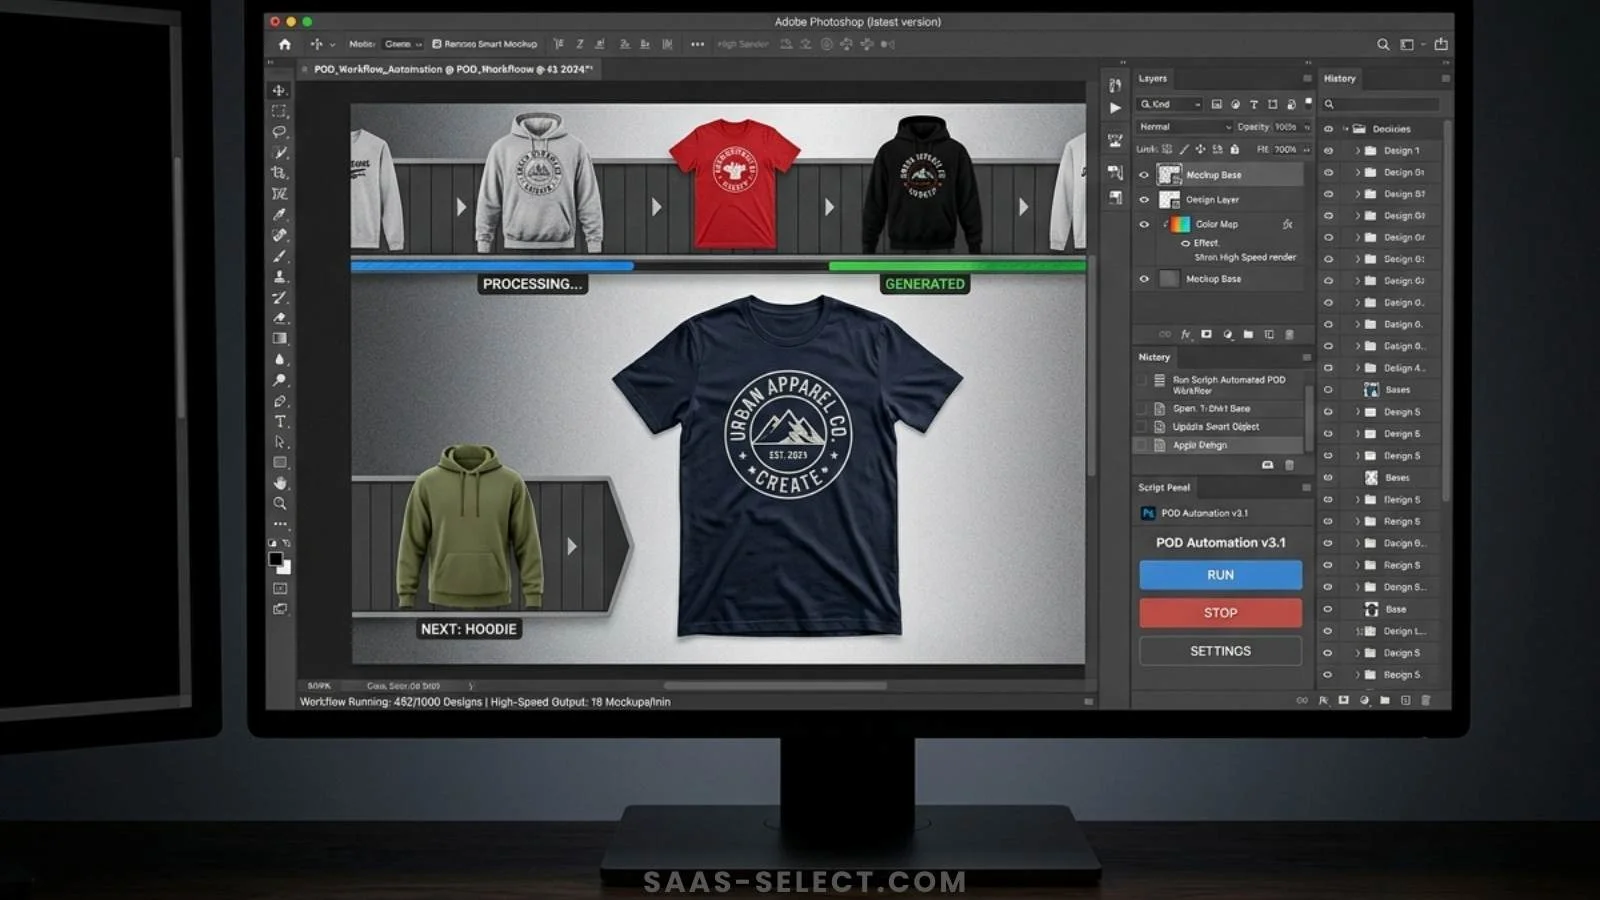
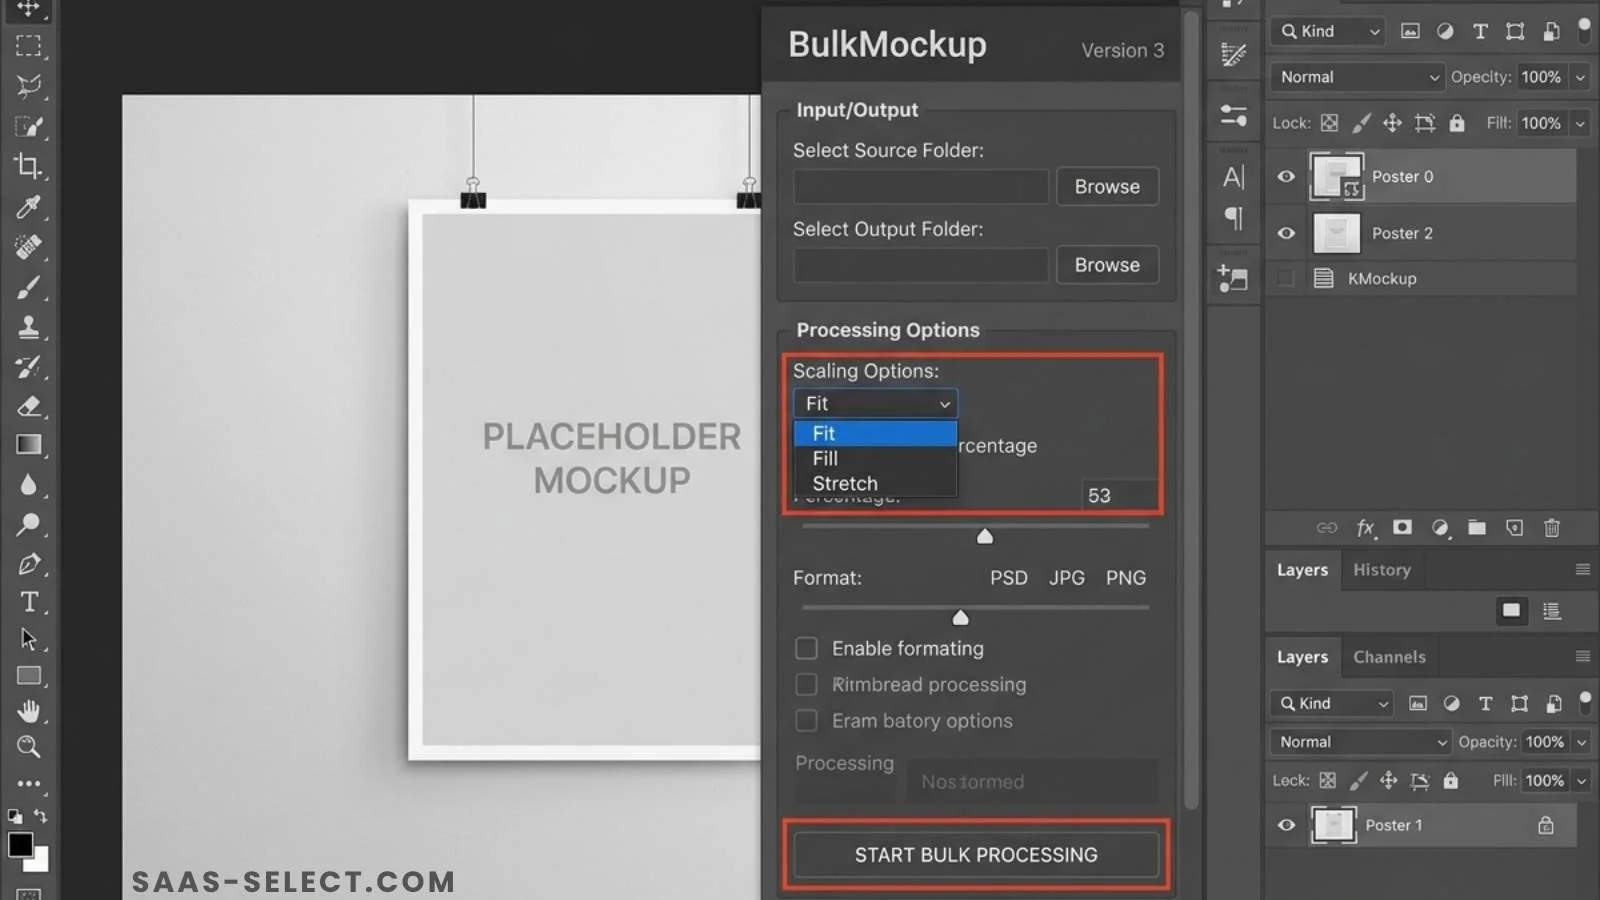
Step 3: Executing the Batch Process
Once your folders are structured and your master PSD files are configured, you are ready to initiate the batch generation process within BulkMockup.
Running the BulkMockup Plugin
Launch Photoshop, open the BulkMockup panel, and link your three core directories:
| Configuration Field | Target Directory / Setting |
|---|---|
| Design Folder | Select your organized PNG folder |
| Template Folder | Select your master PSD template folder |
| Output Folder | Select your designated export folder |
| Export Format | JPEG (80-90% Quality for Web) or PNG |
| Smart Object Target | Match the name of your template’s Smart Object layer |
Review your scaling settings. BulkMockup allows you to auto-fit designs relative to the bounding box width or height. For standard apparel, setting the design to fill 90% of the Smart Object width ensures consistent margins across different artwork aspect ratios.
Click “Run”.
The manual grind ends here. Watch as Photoshop opens templates, injects designs, transforms scales, applies realistic garment displacement maps, and exports finished files locally at lightning speed.
Because this processing happens on your local hardware, you avoid the monthly credit limits, subscription tiers, and slow render queues associated with cloud platforms. If you are weighing your infrastructure options, you can compare BulkMockup against cloud alternatives to see how local rendering maximizes asset control and eliminates recurring overhead.
Step 4: Metadata and Safe Publishing
Generating hundreds of high-quality mockups is only half the battle. You must deploy them to your e-commerce channels safely. High-volume automation requires strict compliance with marketplace algorithms to protect your seller accounts from automated flags.
Managing Exported Assets
BulkMockup automatically appends the design file name to the template name, giving you clean, identifiable filenames. Use these structured filenames to map your images directly to your inventory CSV upload sheets for Shopify, Etsy, or Printify. This eliminates manual data entry and reduces tool fatigue during massive catalog expansions.
Compliance for Print-on-Demand Marketplaces
When preparing metadata for automated uploads, platform-specific rules are absolute. For example, if you target Redbubble alongside your independent storefront, you must configure your listing CSVs to contain no more than 15 highly relevant tags per design. Exceeding this strict limit triggers automated spam filters, which can lead to immediate account termination. Keep your metadata tight, precise, and descriptive.
Next Steps for High-Volume Sellers
Automating your mockup pipeline removes the administrative bottleneck that keeps many POD businesses small. By pairing organized local directories with precision Photoshop Smart Objects, you allow a single operator to manage the output of a large-scale agency.
To ensure your computer hardware can handle the intense processing load of local automation, check out our full BulkMockup testing methodology where we break down real-world render speeds, hardware benchmarks, and template stress-tests. Optimize your workspace, build your master templates correctly, and let automation handle the heavy lifting while you focus on scaling revenue.
More from this series
Tools mentioned in this guide