Automate POD Mockups in Bulk
Uploading winning designs should be the most rewarding part of running a print-on-demand business. Instead, high-volume sellers waste hundreds of hours manually dragging and dropping PNG files onto flat-lay t-shirt templates.
If you want to scale a massive catalog across Etsy, Amazon Merch, and independent storefronts, you must learn how to create mockups in bulk. Relying on manual editing restricts your upload velocity and drains your operational bandwidth.
This guide breaks down the exact automated workflow used by elite sellers. We cover how to prepare your assets, configure variable data templates, and generate hundreds of retail-ready images without sacrificing quality.
Why Manual Mockup Creation is a Growth Bottleneck
Treating mockup generation as a manual design task is a critical operational failure. When you manage a catalog of 5,000+ listings, single-file processing creates a massive bottleneck that stalls revenue growth.
Every minute spent nudging a graphic to center it on a JPEG is a minute stolen from niche research and SEO optimization. High-volume print-on-demand is a numbers game. Your operational workflows must reflect that reality.
To understand the business cost, look at the pure math of processing a standard batch of 100 new designs.
| Workflow | Time Per Batch (100 Files) | Opportunity Cost |
|---|---|---|
| Manual Editing | 5 hours | Lost niche research time |
| Basic Action Scripts | 1.6 hours | Setup and error correction |
| Enterprise Automation | ~8 minutes | Negligible |
By switching to bulk generation software, you effectively buy back five hours of operational bandwidth per batch. This allows founders to focus entirely on strategy rather than repetitive data entry.
Prepare Your Design Files First
Software automation heavily amplifies bad inputs. If you feed poorly formatted files into a bulk generator, you will instantly create hundreds of unusable, misaligned product photos.
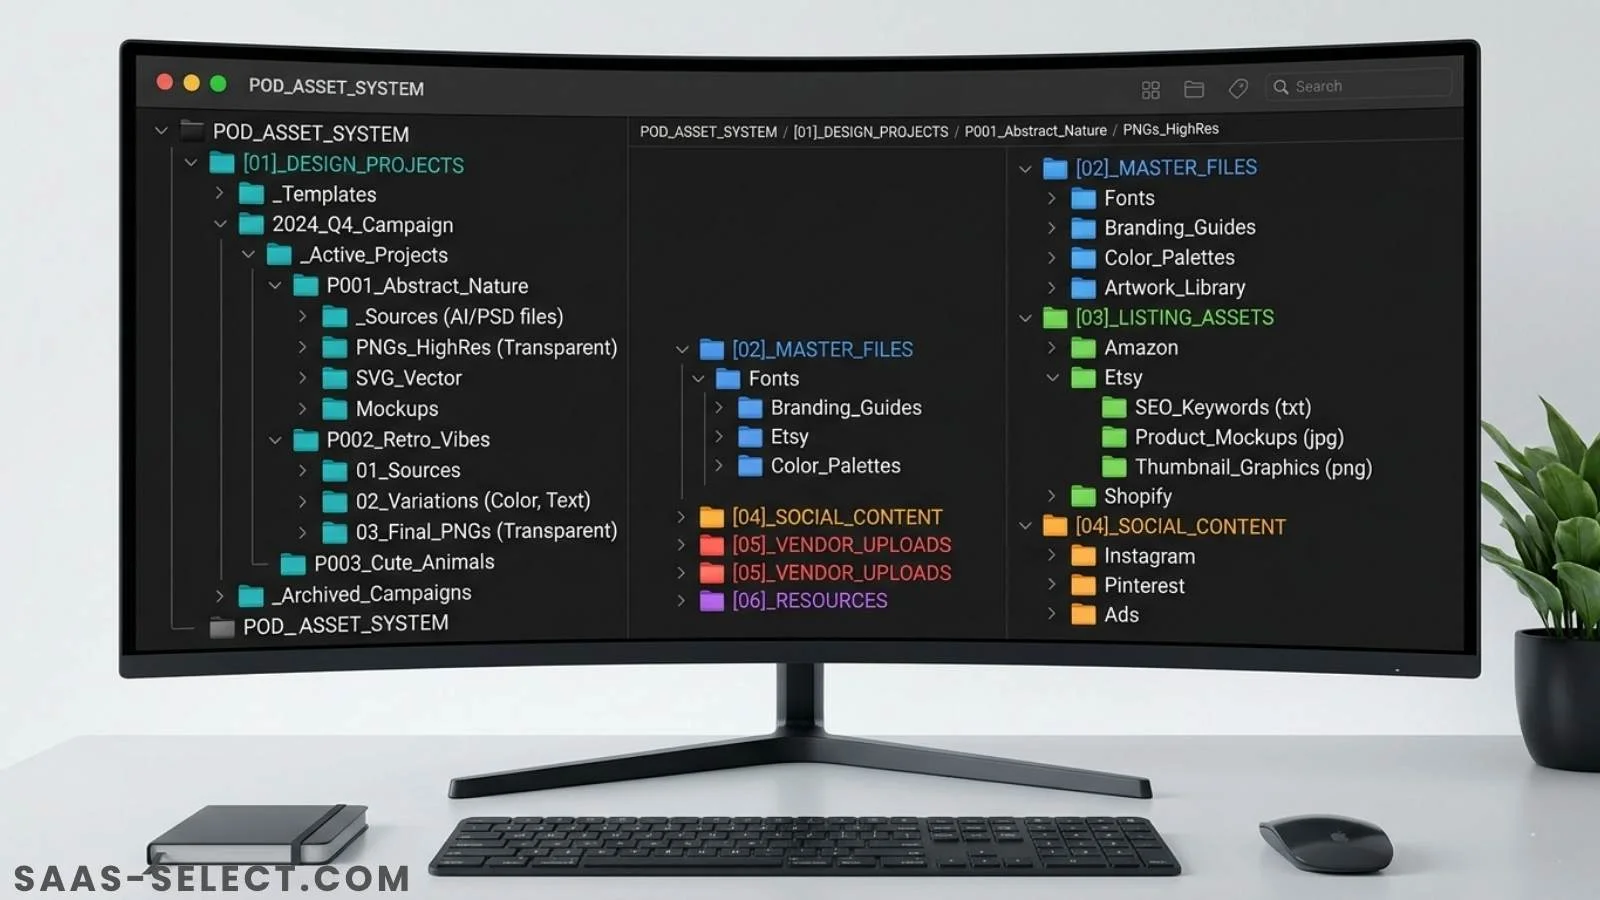
Before touching any mockup software, your master design files must be standardized. Establish strict canvas dimensions, enforce a universal 300 DPI, and strip out all unnecessary background layers.
A messy folder structure will also break batch processing software that relies on sequential naming conventions. Before proceeding, ensure you properly Organize & Tag POD Digital Assets so your variables map correctly during the upload phase.
The Step-by-Step Bulk Automation Workflow
To process designs at scale, you need an enterprise-grade tool built for high-volume generation. Platforms like MyDesigns, BulkMockup, or Placeit’s API are specifically engineered to handle heavy variable data inputs.
This workflow uses MyDesigns as the primary example, given its deep integration with direct-to-garment publishing pipelines. The core principles, however, apply to any bulk generation software.
Step 1: Upload the Master Batch
Start by uploading your pre-formatted batch of PNG files into a secure project folder. The software will ingest these files and assign them as your primary variable image layer.
Ensure your file names already contain your primary keywords. Many bulk generation tools automatically scrape the filename to populate your future listing title, eliminating manual data entry entirely.
Step 2: Map Variables and Positioning
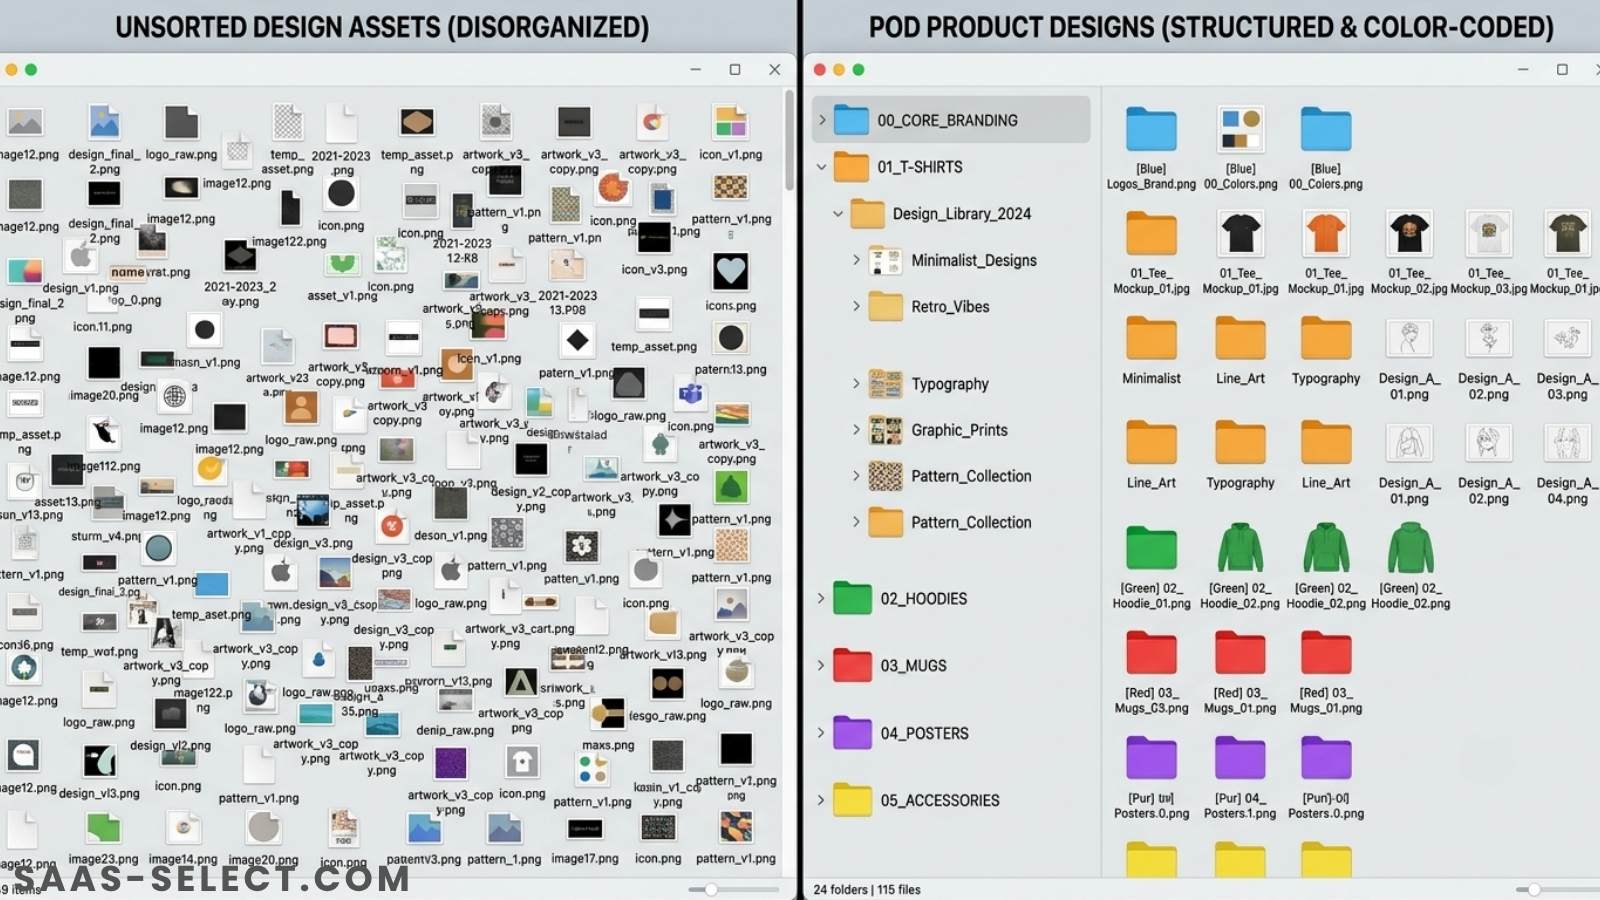
This is where the automation succeeds or fails. You must configure the master template to act as a universal bounding box for every uploaded design.
Template precision is critical, especially for complex garments. You must set up the variable data template to ensure chest designs are perfectly centered above the pocket on a hoodie. This guarantees the graphic never awkwardly overlaps or bleeds onto the sleeves when generating batches of 100+ files.
Step 3: Execute the Generation Queue
Once the bounding box and scaling rules are locked, select your target mockup templates. High-converting listings typically require a mix of flat lays, ghost mannequins, and lifestyle model shots.
Select the batch, hit generate, and let the cloud servers process the rendering. Depending on server load, processing 100 high-resolution lifestyle images usually takes under ten minutes.
Safe Publishing and Metadata Rules
Generating the images is only half the battle. The next phase involves mapping your freshly minted mockups to their respective product listings and pushing them live via bulk CSV uploads or direct API integrations.
Publishing hundreds of listings simultaneously triggers platform security algorithms. You must protect your accounts from automated spam penalties during mass-uploading pipelines.
When mapping metadata, strictly adhere to platform tagging rules. For example, Redbubble enforces an absolute maximum limit of 15 tags per design. Exceeding these hard limits via automated CSV uploads will result in shadowbans or immediate account termination. Always throttle your daily upload velocity to mimic natural human behavior.
Frequently Asked Questions
Can mockup creation be automated entirely?
Yes. By pairing variable data templates with tools like MyDesigns or BulkMockup, sellers can generate thousands of product images per hour. You only need to set the universal scaling rules once per garment type.
Do bulk mockups hurt conversion rates?
They can if the base templates look unnatural or repetitive. To maintain high conversion rates, cycle through different lifestyle models and avoid using the exact same flat-lay background for every single product in your store.
Which software is best for high-volume mockup generation?
MyDesigns is excellent for all-in-one generation and cloud publishing. BulkMockup is the best choice for sellers who prefer to host their custom PSD files locally to avoid subscription tool fatigue.
More from this series