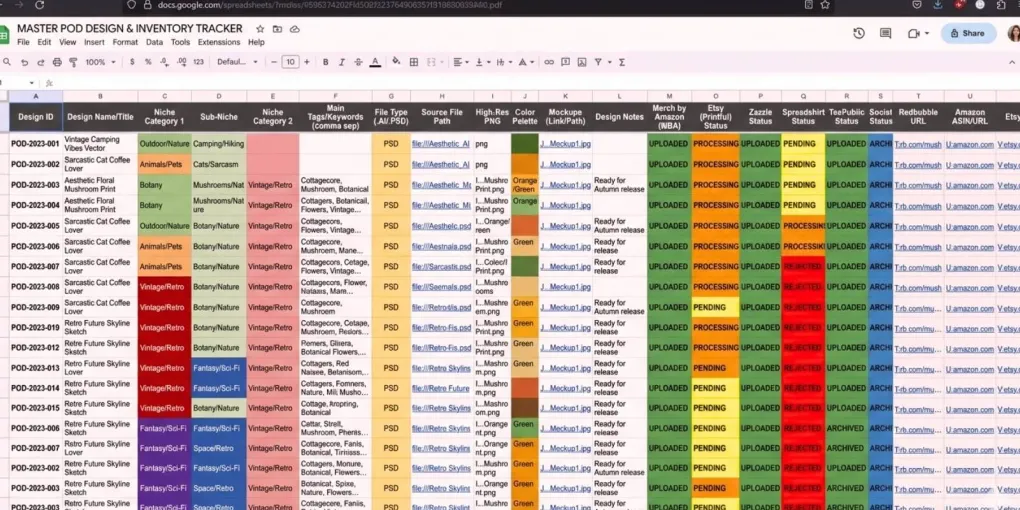
Organize High-Volume POD Shops: The 2026 Inventory System
How to Organize POD Designs for High-Volume Shops
Scaling a print-on-demand business from 50 designs to 5,000 breaks standard workflows. What used to be a straightforward weekend upload session quickly becomes a chaotic bottleneck of unnamed PNG files and scattered metadata, and the failure rarely announces itself early — it’s usually invisible until a launch day when three “final” files turn out to be three different versions of the same graphic.
To survive this growth phase, you must organize POD designs at an enterprise level, with a system built to scale past the point where memory and habit stop being reliable. Without a structured workflow, sellers waste hours hunting for the right transparent file instead of launching product lines.
Here are the exact database systems high-volume sellers use to prevent errors, scale across platforms, and eliminate lost revenue — the process side of staying organized, not the file-browsing software side.
The Master Tracking System
Relying purely on local computer folders guarantees operational failure. A basic folder tree cannot track platform upload statuses, target keywords, or copyright verification dates.
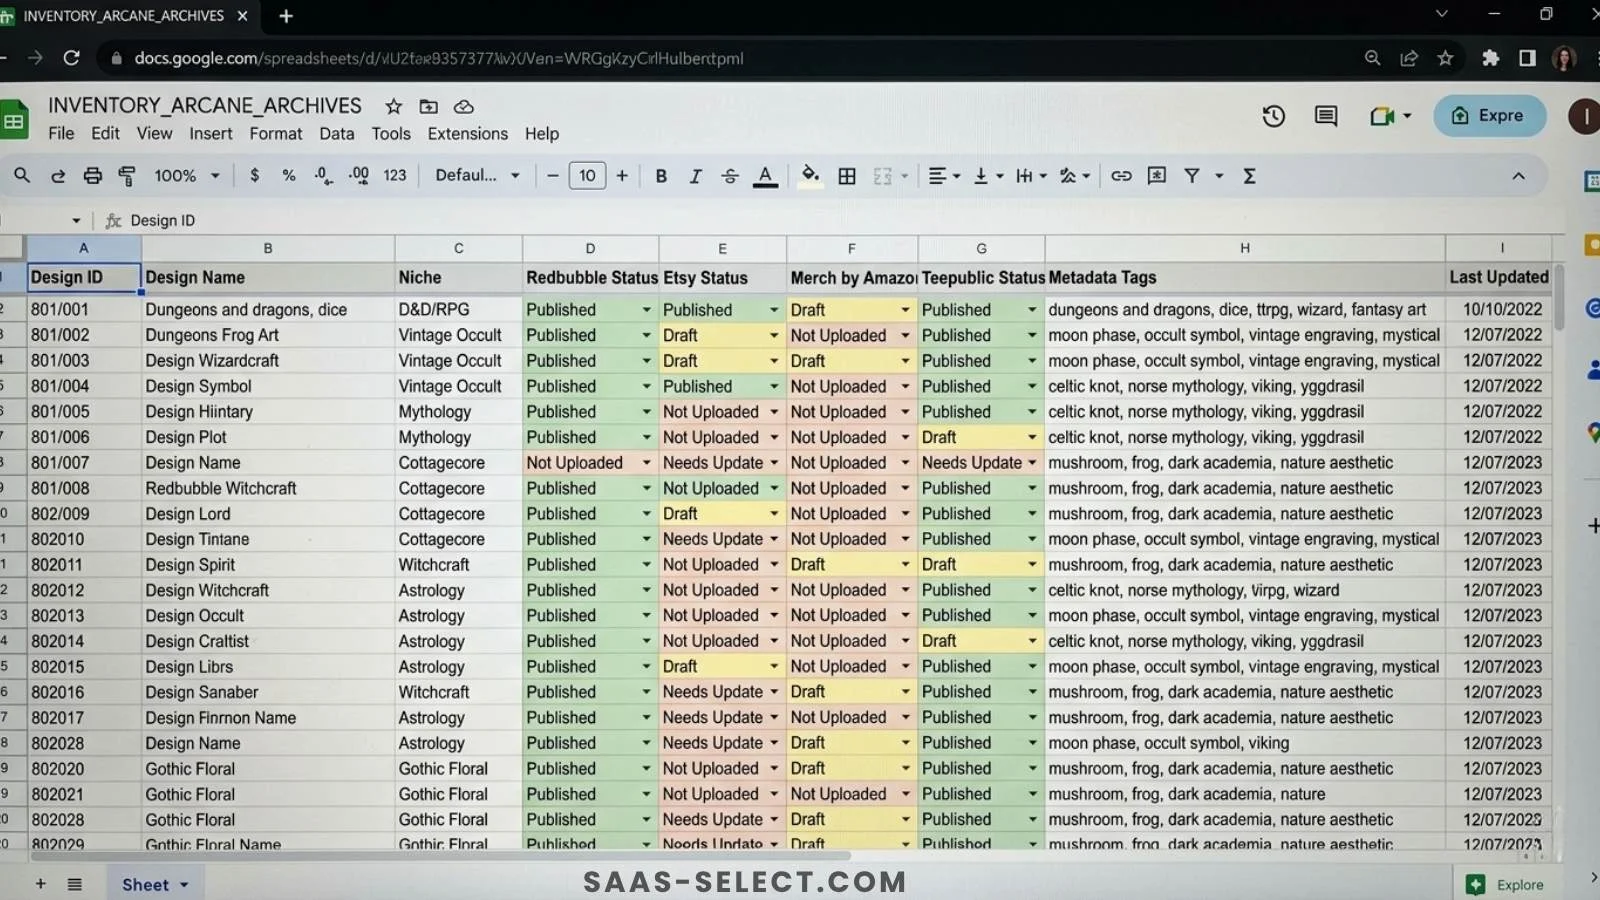
When you manage hyper-specific niche assets, you need a centralized database. Replace desktop folders with a master Google Sheet or Airtable base to act as a single source of truth.
A tracking document named INVENTORY_ARCANE_ARCHIVES serves as the perfect central brain for a store focused on literary and fantasy niches. This spreadsheet tracks the exact cloud location of the raw design file, the sub-niche, and its publication status across every storefront, from Redbubble to TeePublic and Gumroad.
Example: Inventory Tracking Table
| SKU / Design ID | File Path | Niche Category | Upload Status |
|---|---|---|---|
| ARC-045-Mimic | GDrive/RPG/Mimic_Chest.png | Tabletop RPG / D&D | Redbubble (Live), TeePublic (Draft) |
Once your master sheet is clean, you can easily connect it to bulk automation workflows. For a step-by-step guide on generating mockups from your organized assets, check our guide on using BulkMockup to automate POD mockups.
Metadata Hygiene, Briefly
Your tracking sheet is also where metadata gets prepared before it ever touches a marketplace upload page — draft titles, descriptions, and tags there instead of writing them on the fly, so your copy stays consistent across a growing catalog. Keep your tags column enforcing platform limits directly (Redbubble’s 15-tag cap, for example) so a bad upload never slips through.
This article is about the tracking system itself — the spreadsheet and the process. If what you actually need is software to organize and preview the raw design files (not the metadata rows), that’s a different problem with a different toolset. Our DAM software comparison covers Eagle, Air, and Notion specifically for that.
Bridging Organization with Automation
Once your tracking sheet is clean and your metadata is locked, you are ready to scale. A pristine database is the foundation of a high-volume POD operation, allowing you to transition from manual data entry to workflow automation.
Before connecting any software, ensure your database contains these core elements:
- A standardized naming convention for all high-resolution PNGs.
- Pre-vetted metadata that complies with the strictest platform rules.
- A clear folder hierarchy in your cloud storage mapped directly to your spreadsheet.
- Strict alignment parameters for automated generators.
Connecting your master inventory to bulk generation tools changes the entire trajectory of your business. When batch-generating apparel assets, your database should dictate specific placement rules. For example, flagging that a graphic must be strictly centered on the chest and never overlap with pockets or spill onto the sleeves.
If your files and alignment constraints are strictly organized, you can easily automate mockup generation without misaligning designs or applying the wrong tags. For a practical walkthrough, read our guide on using BulkMockup to automate POD mockups.
Automating the Sheet Itself
A tracking sheet that just sits there is still better than folders, but the real payoff comes once it starts triggering things instead of just recording them. Connect it through Zapier or Make (formerly Integromat), and a status change in one column — say, flipping “Upload Status” from “Draft” to “Ready” — can automatically kick off a mockup batch, notify a Slack channel, or queue the file for your next publishing pass. That’s the difference between a spreadsheet as a filing cabinet and a spreadsheet as the actual control panel for your shop.
Start with one trigger, not five. The most common first automation sellers set up is auto-flagging any row where the metadata columns (title, tags, description) are incomplete, so nothing gets uploaded half-finished. Once that’s reliable, add the next one. Wiring up every possible automation on day one is how the sheet itself becomes the new source of chaos it was supposed to replace.
Run this weekly, not sporadically, so the inbox never becomes its own backlog.
When to Upgrade to a DAM Tool
A spreadsheet works well for most sellers, but there are clear signs it’s time to upgrade to a dedicated Digital Asset Management (DAM) tool:
- Your catalog exceeds 10,000 designs.
- You manage multiple designers or outsource asset creation.
- You need visual previews and instant search by color, shape, or file type.
The signal to watch for isn’t catalog size alone — it’s how much time you spend scrolling through a spreadsheet row hunting for the actual file it points to. A tracking sheet tells you a design exists and where it’s supposed to live; it was never built to show you what the design actually looks like at a glance. Once that gap starts costing real minutes every day, that’s the point to add visual asset software on top of the sheet, not instead of it.
For a detailed breakdown of the top DAM tools for POD sellers, check our guide on organizing and tagging POD digital assets.
Frequently asked questions
What is the best way to organize POD designs for a high-volume shop?
Use a centralized spreadsheet (Google Sheets or Airtable) linked to a cloud storage provider like Google Drive. Track file locations, metadata, upload statuses, and platform-specific rules in one unified dashboard. This replaces chaotic local folders with a single source of truth.
Should I use a spreadsheet or a dedicated DAM tool for POD organization?
For most sellers managing under 10,000 designs, a spreadsheet paired with cloud storage is perfectly sufficient. Enterprise-level operations with multiple designers or complex licensing may eventually require a dedicated Digital Asset Management (DAM) tool like Eagle or Air.
How do I manage metadata across multiple platforms (Etsy, Redbubble, TeePublic)?
Maintain a master metadata column in your tracking sheet that follows the strictest platform rules. Adapt your tags globally to respect constraints — for example, cap tags at exactly 15 for Redbubble to avoid spam penalties. This protects your accounts from algorithmic shadowbans.
What should I include in my POD inventory spreadsheet?
Include: a unique SKU/Design ID, file path (cloud location), niche category, upload status per platform, target keywords, titles and descriptions, copyright verification date, and placement rules (e.g., chest center, above pocket). This ensures your database is automation-ready.
More from this series